
Because of the many factors that influence both the cosmetic and functional aspects of the prosthesis, implant reconstruction of the edentulous maxilla remains one of the most difficult restorative tasks.
Bar-retained prosthesis procedure entails the installation of three or four implants as well as the attachment of a custom bar. This bar gives rigid retention to the denture by way of a series of clips that fit over the top of the bar. The upper and lower jaws will also benefit from the bar-retained overdenture care. It also allows you to clean your denture by removing it from your lips. The bar that stays attached to the implants in the mouth must also be brushed.
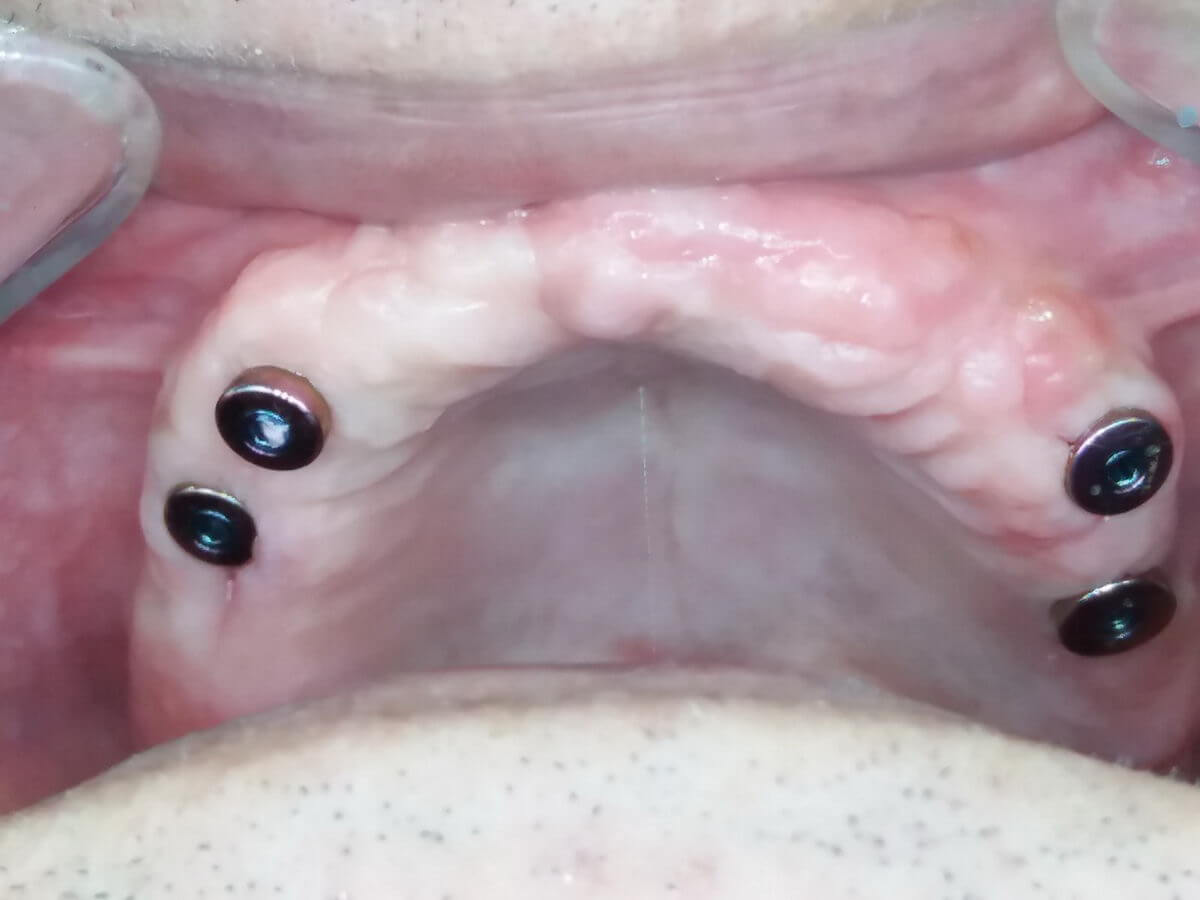
Initial clinical situation
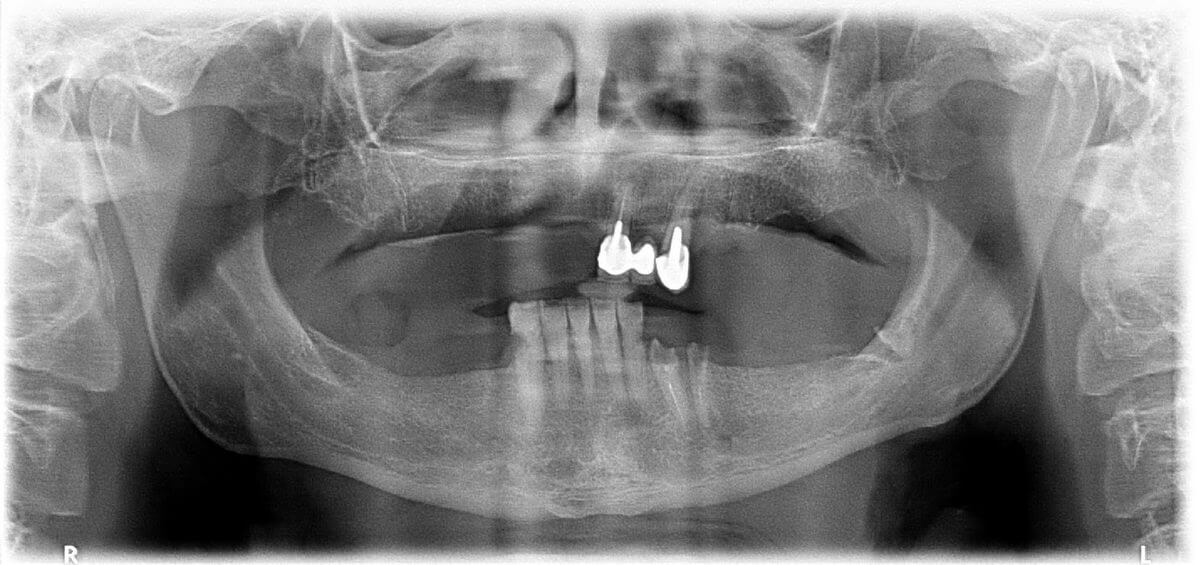
Since a patient’s cosmetic needs and preoperative condition differ, a significant amount of time must be expended on correct diagnosis to ensure that patient expectations are met and predictable results are obtained. A 60-year-old male patient, presented with a partial edentulism – loss of most of the teeth in the upper jaw area. The colour of teeth based on the Classical VITA colour guide was A2, which indicated a natural, light ivory shade.
Bone structure density: D2-D3.
Oral soft tissue thickness: medium.
Treatment planning
Initial plan for the procedure is to extract the residual teeth for a prosthetic solution with two lateral bars, for perfect stability and security of the prosthesis.
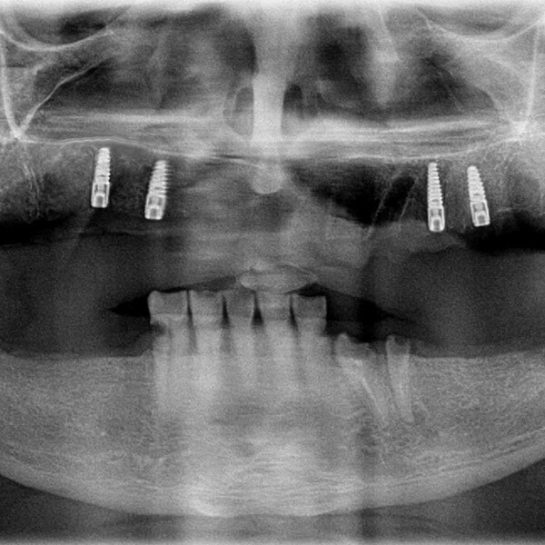
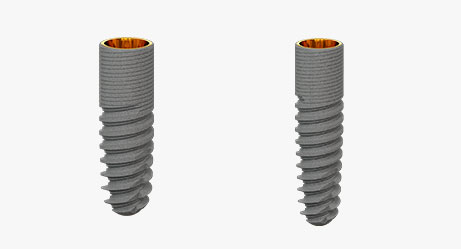
The cone beam of the patient showed that the bone structure density and oral soft tissue thickness are enough and allows high primary stability for ROOTT R implants. ROOTT R implant system was chosen in this case because it allows high and anticipated steadiness because of its macro design. The system of implants has an active self-tapping thread and a reliable tapered connection between implant and abutment. Four ROOTT R implants were chosen for prosthesis implantation.
Implants: 4 ROOTT R.
Implant sizes: R3010 (x3); R3012 (x1).
Surgical procedure

Two stage dental implant procedure
The implant was placed deep inside the jawbone after an X-ray was used to precisely plot the optimal location for the implant, make an incision in the gums, and insert the implant. Bone graft is strategically inserted around the implant to improve bone interaction with the implant.
Following that, there is a healing time during which the jawbone fuses with the implant in a procedure known as osseointegration. So that the bar-retained implant would have a solid and stable base as a result of this.
During the second surgical procedure with the uncovering implant the healing abutment is placed for the process of soft tissue healing. Healing abutments will help gum tissue recover by sealing them from oral environments. After two weeks, when the gum tissue is healed the aesthetical view is achieved, they are removed.
TRS-S cassette with all instruments inside for ROOTT R implants from the same manufacturer as implants were used, to achieve the flawless result.

Implant can be placed by a flap approach with subcrestal or crestal position of the implants. Delayed loading technique was used because of osteoplasty.
After 6 months of osseointegration, Healing abutments were screwed in place to allow the healing process and create an emergency profile. Once the implant has healed, an impression can be taken to make a stone model by which the final denture will be made.
In this case, the healing period was 2 weeks and GF2 healing abutments were used.
Prosthesis
Impression
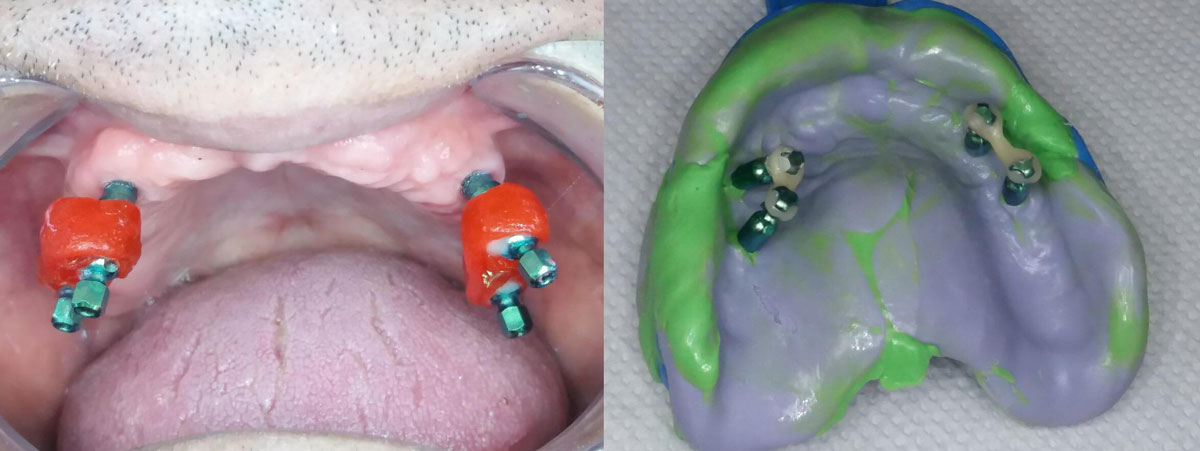
In this case an open tray impression method was used, to have complete accuracy.
Bite registration was made using wax.
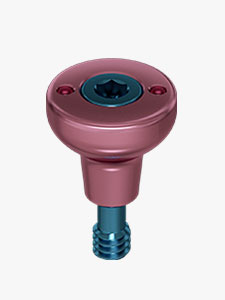
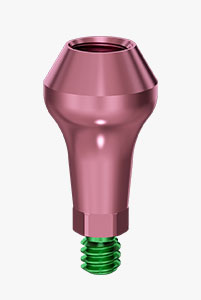
Abutment placement
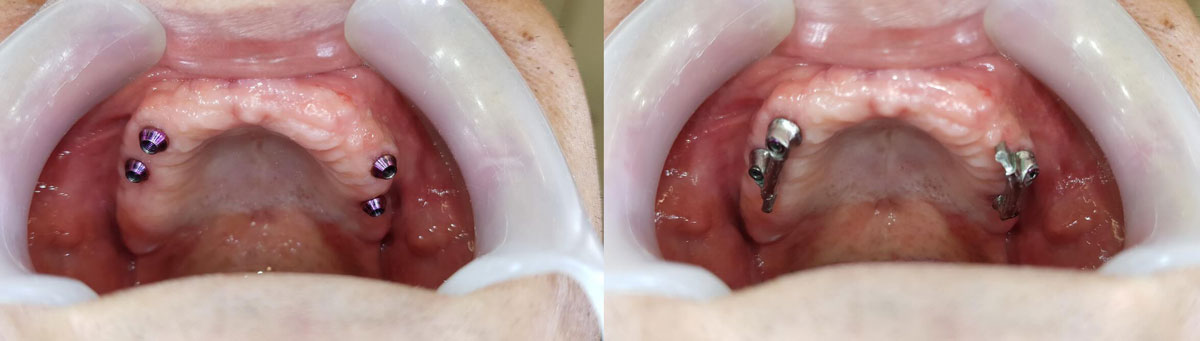
Overdentures supported by 4 implants are reported as being highly successful in the edentulous mandible. The lateral bar was digitally printed using ROOTT digital library for Exocad. The prosthesis was made digitally and manually, using programs and M2 Multi-unit abutments. Multi-unit abutments allow it to produce prostheses supported by implants with non-compliant axes of up to 30°.
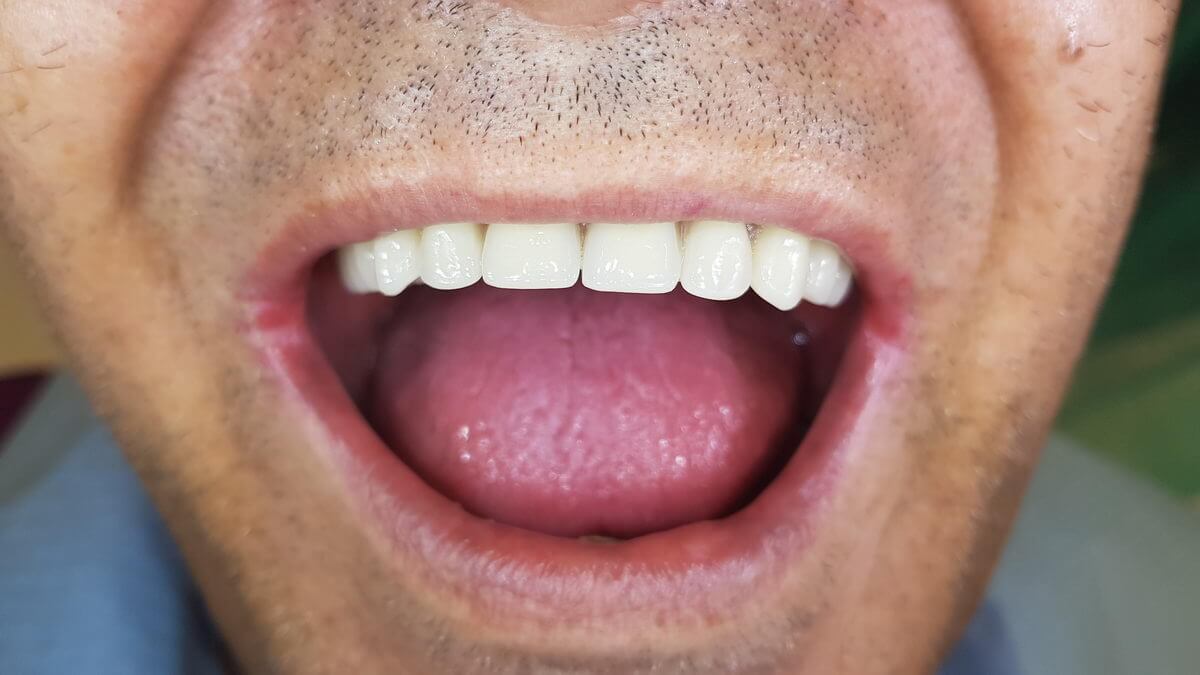
Final construction
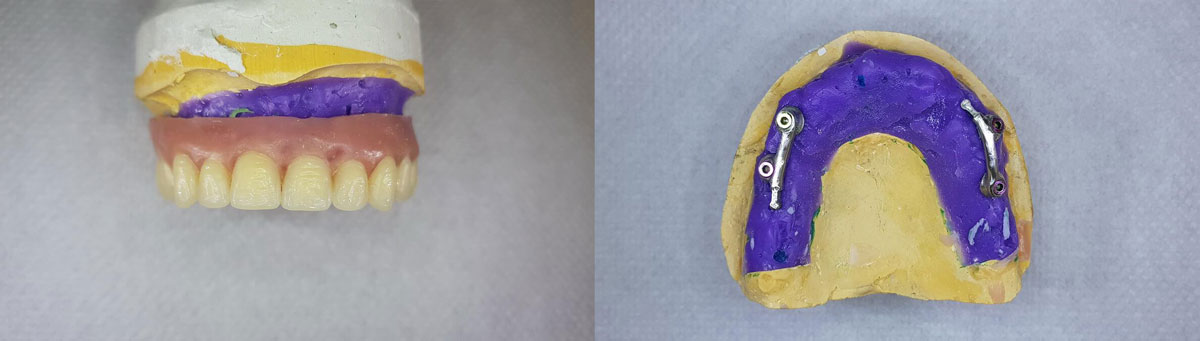
A bar-retained overdenture with dental implants is an ideal choice for patients who need complete tooth restoration in the upper and/or lower arch of the mouth. A bar preserved overdenture is a removable prosthesis that replaces missing teeth in the mouth. When the procedure is done, the patient will have a reversible reconstruction that has been specially engineered to restore patients natural teeth in a manner that vastly enhances your look, as well as the additional benefit of being clipped to a fixed structure, which limits denture mobility and encourages optimum function when eating or speaking.
References:
Ralph W. and Jean L. Bleak Professor of Restorative Dentistry, Director of Implant Dentistry at the University of Southern California School of Dentistry / Private Prosthodontics Practitioner, Pasadena, California
Bio:
Tome Piperevaliev (North Macedonia)- General Dentist at PHO Denticija Gevgelija
Experienced General Dentist with a demonstrated history of working in dental medicine. Skilled in Restorative Dentistry, Endodontics, Prosthodontics, Oral Surgery and Implantology.
Healthcare professional Mastering dental science focused in oral surgery from Univerzitet ‘Sv. Kiril i Metódij’ vo Skopje.
Resident in oral surgery since June 2018